Showing posts with label Faceup. Show all posts

Thursday, April 3, 2014

Saffron


Meet Saffron :) This will be the obligatory box opening post XD I've actually reserved "saffron-tea.blogspot.com" but unless I give her some really crazy back story (which i do not have the imagination for) I doubt that blog will be updated XD

She is a Unoa Sist, Fresh Skin. Alchemic Labo, the company that produces her, used to only cater to the Japanese market, meaning they were pretty difficult to come by. I was reluctant to purchase a 2nd hand version, and so kept waiting for the chance that pre-orders for International orders would eventually be available.....

I waited for close to 6 years! I first came across photos of Unoa Lusis back in mid 2008 when I was trying to make my own BJD and instantly fell in love with these dolls. My hopes started waning as year after year, no pre-orders were made available, and I missed the lottery in -I think- 2012.....but this year in January, a 2 week window was open for pre-orders!! The fiance (then-bf) had promised me one as soon as it became available, and since I did not ask for a birthday gift last year, it became my belated birthday gift!!! (yeah, I'm fussy when it comes to gifts as I don't have much space and am very particular with what enters my room :X) I quickly placed an order, and added 3 face plates so I could have some practice, as well as versatility :)

And so.....on March 31st, Saffron arrived! This will be a lengthy and picture heavy post, so I'll divide it into 4 parts - Box Opening, Faceup, Sewing her first outfit, and Review.


=============================================
Box Opening
=============================================


Here's Eva welcoming Saffron :P 


TA-DAH!~~~~ That's Ahma's arm, she was even more excited for this box opening as she's now familiar with what I do XD She kept remarking, "This one is much bigger than the other one!" XD XD XD


DUN-DUN-DUNNNNN!!!!!! The biggest surprise was seeing that she came assembled :O
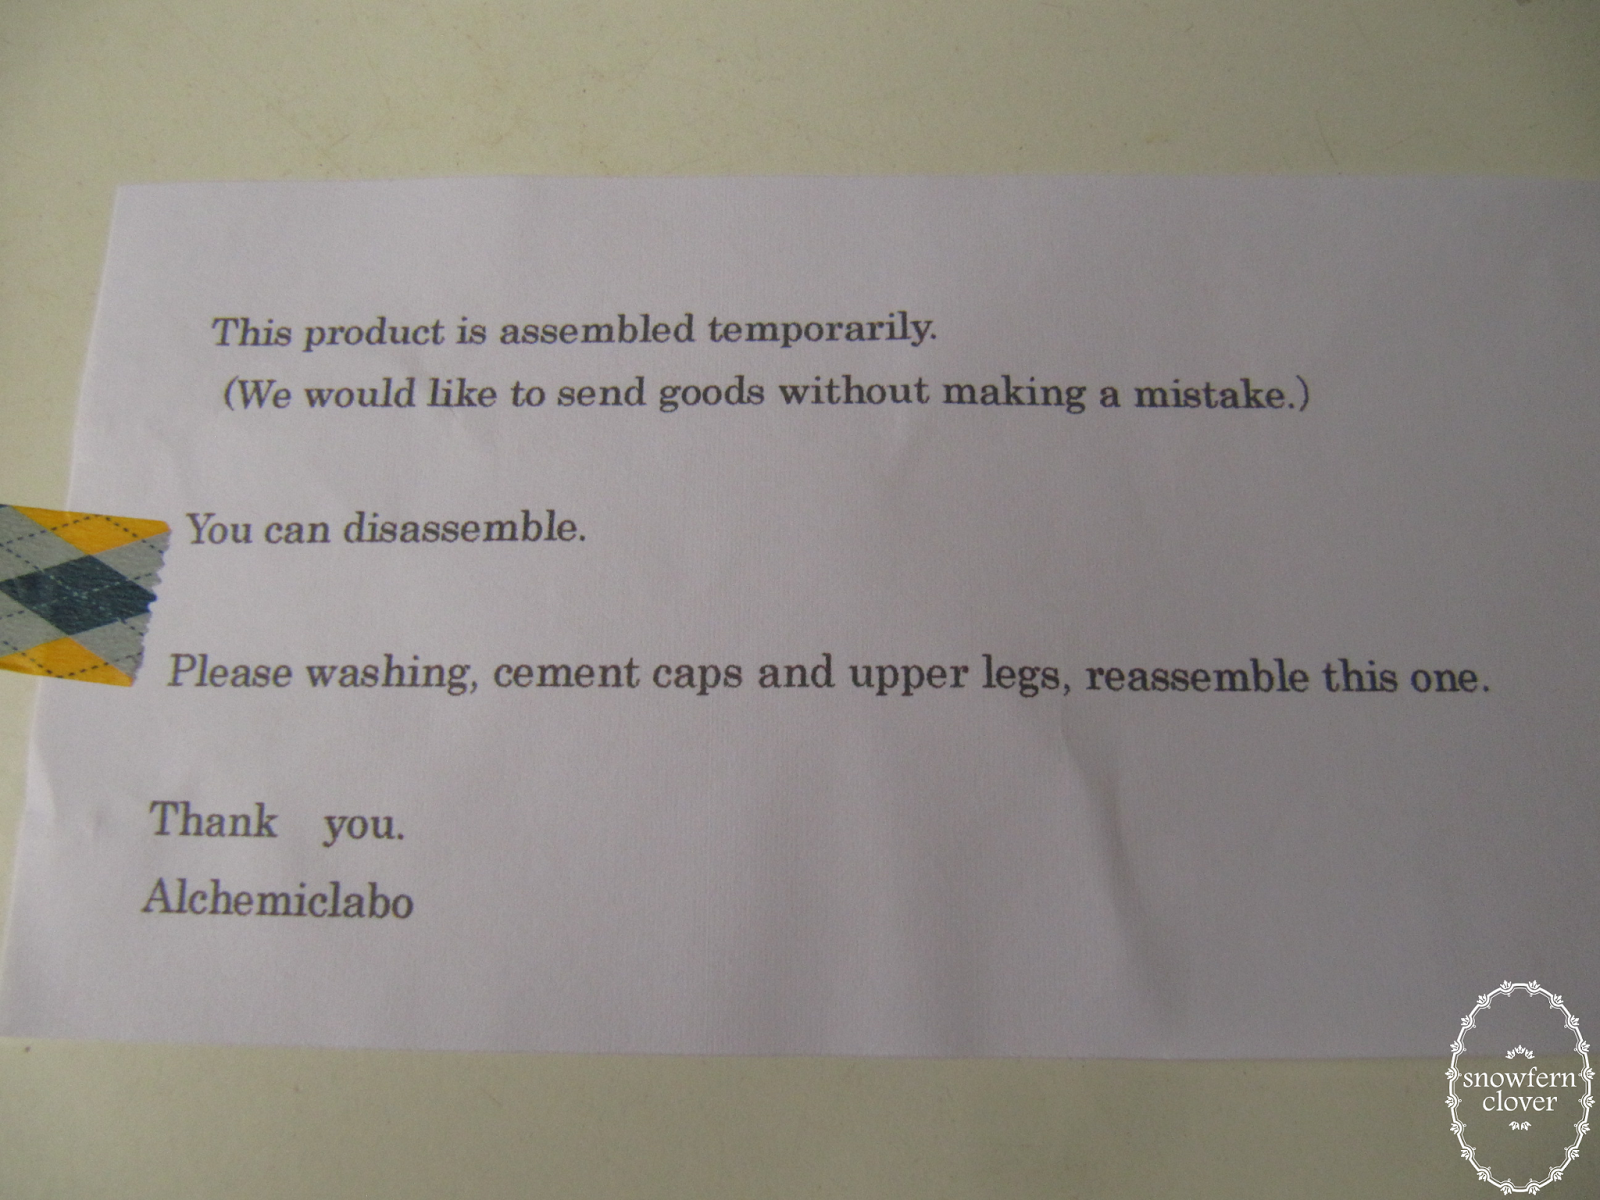

There was an accompanying note explaining why she was strung!

 Another surprise was the paper pattern to use when designing outfits for her O.O LOVE IT. Can't wait to make fitted clothing :D

Although the instructions were in Japanese, there were enough illustrations to help with the re-assembly.  
And best of all, even though it was stated that the eyes would be randomly assigned, I did add a note during checkout that I would prefer Blue/Gray eyes if at all possible....am not sure if it was a coincidence or really wonderful customer service, but I got the eyes I wanted!!! ^_^V

They are acrylic (I think) and have holes drilled for the eye mechanism. Will use them for Lusis!

Ahma kept asking how big she was compared to Clover, and so I quickly threw on a dress I knitted which was too large for Clover to protect Saffron's modesty. Ahma couldn't help but fiddle with her heheheheheh. It was quite sweet watching her marvel at dolls...quite a contrast to when Clover first arrived (she had a hard time understanding why adults would still play with dolls hurhur)

 Sisters! They're both 1:4 scale, or classified under Asian Mini/MSD sized dolls in DoA (I think).

 I coincidentally had 3 spare pairs of 12mm eyes which I had purchased for Clover, which were quickly put to use! The right most one is the Sist Decadent faceplate, I'm wondering if I can mod her into some cyborg type character....*taps chin*. Anyhow the 2 on the left are the Lusis Default and Wink faceplates. TOTES ADORBS. The doll also came with a faux fur (mohair?) white wig, which TBH I'm not too fond of, but maybe after some dyeing I can work it into something more appealing.

Oh and she's in her large bust option (purchased separately) in this photo :) Clover is enough of a tomboy for them both!

=============================================
Faceup
=============================================


As I was going to wash and re-string Saffron, I thought that Clover needed a bath too. I had made the mistake of spraying her body with MSC even though I had little-to-no-intention of body blushing her....so all I did was wet sand the more visible and sharp flash lines.

WIP photo for quality control :P

So.....since I had done Clover's faceup before, I decided to be braver with Saffron's makeup and go with bolder colours. Although I initially had no idea who the Unoa Sist would become, after a lengthy discussion with CH...I thought that Sist would either be Slutty or Demure. And then I viewed a video of a singer dressed like a Pin-up girl and her deep red lipstick captured my attention. Saffron would be a songstress with a happy, almost burlesque style :) But more sweet than slutty *cough* 

I won't go into detail about my process as I've already documented it here, when I did Clover's face up.


This was my 2nd attempt at Saffron's face, the first one was so disastrous I had to clean it off, and re-start the whole process the following day. 4 hours down the drain (stayed up till 3am the first try) T-T But I'm glad I didn't settle for an inferior face-up...because I am totally loving her current look!


Instagram filters make everything look better :E
(I think she looks like Disney's Ariel in this photo!)

She looks so different from different angles!

So where did inspiration for her faceup come from?


Note any similarities?

I had come across this photo in my facebook photostream on a random day...and immediately knew this was how I was going to style her. I opted to go for a friendlier eyebrow shape and keep the red-head tone as she's Clover's sister after all. And at around the same time I had read that blue eyes + red hair is the rarest combination for redheads, so it all worked out great! The wig is an old one I made and as Clover's head is a little larger, I temporarily stuck doublesided tape to hold it down (NOT RECOMMENDED but eh I'm not selling her and I know how to handle tape residue :X) I'll be making a new wig specifically for her but I'm really partial to this combination now. 

Eyes were the default that came with Clover, and I don't feel brave enough to drill holes in it, so they're held in place with blu-tack.


More closeups of her faceup detail. Yeah, it's not perfect, but I'm improving I think. I used heavily-modified eyelashes from Daiso this time since her more dramatic look required more dramatic lashes :P 

I've already had a number of comments about her lips, so I thought to add my process here for those interested:

- base layer of medium pink pastels
- MSC
- Folk art Napthol Crimson, thinned and then drybrushed
- Shiny/glittery eyeshadow dabbed onto previous layer before fully dried. It was from a knockoff MAC eyeshadow palette (not recommended since it's not waterbased, but I figure she's already got MSC coats to protect and it's quite powdery like mica powder so I chanced it) on lower lip, centre area to act like lip-gloss
- Napthol Crimson, used thin liner brush to emphasize outline of lips and increase emphasis of lip-gloss area
- Napthol Crimson + dab of black, highlight mouth slit (?!) with liner brush
- Folkart Gloss Varnish

I want to emphasize that this is not recommended if you're intending to do professional grade face-ups, but since I have no intention of selling my grail doll, I'm quite happy to experiment and in any case, these face plates are far more affordable and replaceable so I'm not too bothered.

I was also careful to keep the line gentle, so that there's more of a subtle transition than a harsh red outline which happened on my first attempt. 

As to the brushes, I used the same ones in the faceup for Clover.

For the eyebrows, they were done differently than Clover's, I painted in the individual hairs...and although it was tempting to sand off the eyebrows in the sculpt, it actually served as a good guide and provides more dimension, so I left it in.

This time round, the only reference I used was the Bec Winnel artwork, so the whole process was much faster, though it did take about 3 hrs the 2nd time round.


=============================================
Sewing the Infinity Dress
=============================================


I had subscribed to a thread on DoA in which Silver Identity had kindly created a tutorial with measurements catered to a MiniFee. Thank You! (haha I don't think he/she reads my blog but yeah, I appreciate it!) I know that some of you have mentioned that it's difficult to get on DoA, and personally I've been having issues with accessing except on my mobile, so I can't fetch the link either...but there are soooo many infinity dress tutorials out there so just do a quick search on DoA or Google and you should be golden.

http://www.denofangels.com/forums/showthread.php?p=7902149

Just for those who are wondering and might want to use my measurements for your own Unoa, here are the dimensions:

Straps - 5cm (W) x 63cm (L)
Waist - 15cm x 6cm
Skirt Length - 14cm

I won't post the instructions here out of respect for the thread starter's hard work, but you can figure it out pretty easily from the online tutorials and adapt accordingly. I whipped this out in less than 1 hr.

The jersey knit material was a half-yard that I purchased at Chinatown early last year...I loved how thin it was and it draped beautifully, so I knew I could make a beautiful dress out of it....a no-brainer why I used it for this dress! I am quite busy, what with having to think about wedding preparations, flat stuff, commissions and a TOP SEKRET PROJEK (haha I'll reveal that in due time of course!) but I get teased quite a bit by Asuka and the fiance for dressing Clover in "auntie" or "office lady" style clothes so it was IMPERATIVE that Saffron have something more suited to her! 

=============================================
Review, and final thoughts
=============================================
Overall, I'm a super-biased reviewer since she's been my grail doll....that and I had many pleasant surprises like the detail in her hands (nails!), and how quickly she arrived after receiving notice of her tracking information.  But there are a few things of note:

Positives
- The fresh skin resin is very heavy and lovely....my doll did not have any apparent cracks, faults nor stains
- eye colour that I wanted
- came assembled
- super easy to pose and stands very well
- SHE'S FINALLY MINE
- ALL MINE
- MUAHAHAHA

Mehs
- The default Sist face plate does not sit well in the head mechanism, and I had to sand down some parts so it would 'catch' properly, and also reduce the risk of cracking the faceplate
- Some of the mould seams/flash lines were pretty sharp, and my guess is they probably gave it a cursory run down the seams with a penknife, but I knew I would wet sand it anyway so didn't bother me too much
- Elastic strings seem a little loose...but I plan to suede the joints so she'll hold poses a little better


Okay! PHEW. I hope you enjoyed this post, please comment to let me know it was worth all my hard work!

(or you know, so I feel less stupid for 'talking' to myself...............)

p.s. I named her after my favourite character in "Absolutely Fabulous". That, and as Asuka pointed out, Clover-tea and Saffron-tea works perfectly together!

Sunday, February 3, 2013

Faceup for Clover


Originally posted in http://snowfern-clover.blogspot.com
~~~~~~~~~~~~~~~~~~~~~~

Good morning Clover! As per my previous post, here she is! As a reward for working hard yesterday, I decided not to delay her faceup any longer :)
 added some shimmer powder to her eyelashes, looks like eyegrub LOL
+points for realism? :P

Closeup of her lip detail, and shimmery powder!

Here are photos of her in morning light! I started prepping her for faceups at about 2pm, and didn't finish until almost 2am this morning. =_=" Most of the time was spent waiting on the sealants to dry, as well as fiddling with the eyelashes.

As mentioned previously, I will start documenting my processes and resources, much like my early days when working with minis. That, and I anticipated taking a number of photos for quality control (symmetry, intensity, spotting mistakes the naked eye can't see etc), so why not! Journaling is becoming more important these days, as my memory....yeah it's not fantastic, nor is it improving :P But most of the time, it is just to re-visit and refresh my memory for future reference. I expect that as I get used to certain techniques and stuff, the detailed journaling will decrease, much like my mini-making notes XD but that is to be expected (read: please do not expect me to keep up this standard of recording!), so without further ado, here goes!

(btw, I will NOT be discussing where to get, how to buy, dolls are scary, etc of BJDs as there are plenty of resources online, this is just my personal stuff mmkay! kthxbye~)


~~~~~~~~~~~~~~~~~~~~~~~~~~~~~~~~~~~~~~~~~~~~

IMPORTANT BJD-RELATED RESOURCES
All my knowledge I've gleaned from lurking around Den Of Angels, aka DoA. I have been a member of the forums since 01-29-2009 (wooo), when I first learnt of BJDs through random surfing and googling. It was when I started thinking about owning my own, after giving up on making them (you can see the disastrous results here: http://www.flickr.com/photos/snowfern/sets/72157616006124022/), didn't have a camera then, so didn't document the progress.

You have to be a member to view the threads I believe, not sure about the rule changes lately. Membership is free, so why not? The place is full of information on where to purchase, care of dolls and the community is friendly. Just take note of the rules as they are pretty strict on what can be discussed.

Den of Angels - http://www.denofangels.com

For faceups, I got to know of this faceup artist, Andreja, through random flickr activity. At first, I didn't know why all she posted were pictures of heads XD I thought she collected them and switched them on bodies or something. See how ignorant I was? ha! But I loved the way her dolls looked so alive, and very fresh looking. I am a visual learner, and her youtube videos are invaluable. Andreja is very generous with her knowledge and techniques on how to do faceups, coupled with beautifully shot and edited videos, please do set some time aside to go through her youtube uploads, especially the Q&A ones :)


Andreja's Youtube: http://www.youtube.com/user/NicollesDreams
Andreja's Blog & Commissions page: http://nicolles-dreams-shop.blogspot.sg/


(thank you Andreja, if by any slim chance you are reading this! :P)

For eyelashes, since my doll is atypically sized, I didn't think the 1:1 eyelashes I got from Daiso would work, but I did come across a fabulous tutorial (actually, I think it's from an Unoa how-to book, translated) on DoA.

Make your own BJD Eyelashes: http://www.denofangels.com/forums/showthread.php?160459-Doll-eyelash-creation-tutorial

It wasn't quite straightforward, so I modified a little and documented my process below.

So that's it for now. I will continue working on her, like body blushing, clothings, possibly add-ons to her sculpt (bunny ears maybe? XD)....not sure if I should set up a separate BJD blog for it?

Do let me know in comments if you think it's a good idea to separate this blog from the BJD stuff!


~~~~~~~~~~~~~~~~~~~~~~~~~~~~~~~~~~~~~~~~~~~~
All the preparation, like cleaning, drying, un-stringing has been done the night before (re: previous post)

BJD Faceup for Clover
(Click on photo for larger picture)


 Start priming the doll. I used Mr Super Clear, aka MSC as a sealant, + primer of sorts. This pic is a side by side comparison of the old can vs the new. Back then, the matte version was called 'flat' :P finished up the old can after spraying only 3 parts :S

You can purchase this locally at most hobby stores, for approx $13++ (the UV version is more expensive, but according to what I've read in various sites, it tends to yellow, and I am not such a stickler about resin yellowing - it happens!, so i opted for the normal MSC). Try Sunshine Plaza, or Hobby Point (I got mine at the Tampines branch)

Dollypart lollipops!! XD

I didn't get help for phototaking, so no action shots. Here's how I held up the parts, using chopsticks and white blu-tac. They were quite heavy, and the winds were pretty strong yesterday, so I used my stash of coloured sands to hold them up. Just be careful when sticking them in, or taking sticks out, as the sand can loosen and cause the other sticks to fall out (my doll's right arm dropped onto the floor. T-T luckily no permanent damage was caused hee hee)

MSC is pretty dangerous stuff, so it's best to use a respirator, a normal mask won't be sufficient! (i really should heed my own advice....:X)
*koff*
moving along....:P

After 2 coats of MSC for the body parts, and 3 coats for the face! Remember to ensure that each coat is dry before re-coating, or problems might occur, like 'frosting' or bubbles or stuff. It was nice and windy yesterday, so this took about less than an hour to prime.

My original plan was to practice by using body blush, but judging from the amount of MSC remaining in the can, I was worried there wouldn't be enough for the faceup, which was the main goal here!!!!!!! So I decided to re-string her first and decide later.

I gave up on the Reeves soft pastels. Although they are pretty good for my polymer clay work - alot finer than the Saintograph set I started out with aeons ago - they were simply not fine enough for the faceup. Tried as I might, the colours simply did not stay on the face T-T

Luckily, I had some Cretacolor soft pastels, purchased in individual sticks at Art Friend. I'm not sure what the colours I used were, I simply played by ear (uh, eye?) and since I had pre-mixed colours which I used in various projects, went along with whatever I had. Luckily they worked!!! Hurrah for primary colours :P

This Faber Castell set was also purchased yonks ago, seldom used. Don't even remember why I got it. Erasers, especially good for correcting mistakes, I even use it to sort of blend some of the harder lines. I didn't really use the soft eraser, but I guess some people would prefer it. Brushes of course, which I had already. The makeup brushes was a cheapo set I found in one of my drawers. Don't even know why I have it, since I don't wear makeup XD

This is the "Magic Sponge" from Daiso that I think all BJD owners know about and love. Finally picked it up recently, in preparation for my BJD :)
Using a soft wide brush, I started with light blusing around the eyes, cheeks, mouth area. Basically, if you watched Andreja's videos, I followed pretty much every single step, up till the eyeliner part, then I sorta winged it as I wanted to go for a simple, natural look for Clover.

Blushed somemore, in a different colour, for peachy, sunburnt look cheeks. This is in preparation for freckles too! At this point, I'd given her another coat of MSC to protect the previous base-blushing. (4th coat at this point) Upside down shots help me check for symmetry.

 Time to do the eyeliner portion! I was really worried about this part, as acrylics can be tricky. I then remembered I had previously purchased some nail art brushes (for making my first 2 dolls), so i dug them out from storage. Diluted the acrylic paints quite a bit with water, as acrylics tend to dry out really fast, and I wanted to take my own time with it. Also, I wanted translucency of sorts, to make it look softer, thus more natural.


Back when I -did- wear a little makeup, it was mostly liquid eyeliner, and this is usually how I liked to add to the ends of my lines. Tried them out on her, botched the job a few times, used the magic eraser and pencil erasers alot....but finally got it done. A quick touchup with black watercolor pencil helped neaten the edges and hard-to-reach places. Again, I didn't bother too much with symmetry or sharp lines, as I knew they could be touched up anytime later, and natural = asymmetrical most of the time anyway! I am trying to relax that obsessive part of me......

Tip on sharpening pencils: The frigging sharpener that came with the watercolour pencil set, although it did give me a pretty sharp tip, it blunted pretty fast (the angle was pretty wide). So I dug around my stash of sharpeners and found one that gave a more tapered tip. My tip on tips is to get a brand of sharpener which gives a more tapered tip, so you don't have to keep sharpening it :P

Added lower lid eyelashes, also with watercolor pencils. I didn't even consider painting them because I know I had shaky hands, and mistakes would be harder to fix. I neatened the lashes and semi-blended them with a small pencil eraser. Man those things are handy!


Intensified the blusher with more peachy tones, and added freckles with watercolor pencils again! I used 2 different browns, as I think freckles aren't all the same colour. After dotting the surface with teeeny circular motions, a cotton bud was used to sort of circle and semi-blend it for a softer look, rather than as if she has dirt on her face. At least I hope I got the effect right. I wanted tiny, barely noticeable freckles just to give her face a little more dimension and character.

Nostrils and sides of nose were shaded to give them some dimension and definition. Space above cupid's bow also slightly shaded.

The lip shades were intensified in preparation for the next step after another coat of MSC (5th at this point)


I was super nervous at this point. The eyebrows help to frame the face, give it expression, and is stupidly difficult to get symmetrical. After reading quite a number of online tutorials on how to do BJD faceups, I decided that none of the templates would work, and would be better off winging it. I mimicked Andreja's method, which was to blush a rough outline in a light shade of the colour the brows would be, then pencil in the hairs. Although I did mess up a bit, at this point all the previous work had already been protected by the 5th coat of MSC, so I went for it with gusto!

I know it's not really symmetrical, but I think it'll be cute to have her slightly mischievous and off-kilter. Adds character. I did consider giving her a quizzical brow, however the eyes wouldn't match so...speaking of which, I noticed the left inner eye for this Lonnie sculpt is shallower than her right eye. Just yanno, something I noticed.


 Okay! finishing touches! I kept the brows a little disheveled, little 10-12 y/o girls shouldn't be subject to tortures such as eyebrow plucking XD 'sides, I think it helps keep her slightly mischievous. I blushed slightly around the edges of the mouth to give her a hint of a smile...shouldn't be too distracting, and only noticeable if I take photos of her at a certain angle. Or at least, that's the plan!

Used a sharp white watercolor pencil to add lines/wrinkles to her lips. Blended it in slightly with (IIRC) a cotton bud. I'm not too fond of hard lines on faces, as you can tell by now...

Coated with 6th coat of MSC after this. I didn't take pics of the next step, which was to highlight the inner portion of the eyes, as well as the inner sides of the lips with acrylics. I diluted a pink and red acrylic mix for this. As you can see, I didn't mix it well as I feel it's always more natural looking to have a sort of blend, rather than homogeneous tone. Let dry thoroughly, lots of shimmer powder (forgot to take pic, was exhausted at this point had to take a break for dinner!) then another coat of MSC (7th) and we're almost done!!!

~~~~~~~~~~~~~~~~~~~~~~~~~~~~~~~~~~~~~~~~~~~~
NOT. This eyelash portion....TOOK FOREVER. or what felt like it anyways :S Please refer to the links above for where I got the tutorial from. I did add my own techniques, since the tute didn't state how to draw the eye shape or whatever.....and I thought that I'd share how I did mine.

First, I took some sticky tape. normal adhesive tape should do. HOWEVER, mine are pretty messed up. Somehow they didn't work very well. But I did some modifications, and I'll show you later. Anyway this is how I started.

I used a sheet of wax paper, it's actually part of my label-sticker sheet. This helped make it easier to cut out the shapes.

This is the back of the paper, which you can draw easily on with a pen or pencil. no precision work here, just a rough approximation will do. I would advise making it slightly longer, in case of errors. of which I made many :S Fold it in half, and then cut.

You should get something like this. Tadah, symmetrical eyeshapes for both eyes.

unfold it. The good part is, you can keep re-using this wax-paper template over and over again to make as many eyelashes as the template holds up XD


i used a metal ruler to kind of separate the hair on this spare brush (I got a cheap set of brushes from Daiso!). It so happens that the colours match my doll's hair, so I was really happy with this coincidence. 


 The fiddliest part to all this is sticking the tape on, front and back (refer to tutorial link above for details). My tape wasn't sticky enough, but after much finagling and fiddling and about half the hairs on my brush winding up all over my table, myself and finally, the bin.....I got it done.

But it meant the hairs might not stay in place for the curling process :( So I used a thin line of normal PVA glue (which dries clear) to edge the hairs, so they would dry in place. that portion wouldn't be seen, and how long/short you want it depends on you anyway, so it doesn't matter about the neatness.

the pad I used was part of a cushioned watch box, i use it to score stuff sometimes. I used one of my sculpting tools, or any rounded edge should work.

HOWEVER. the frigging thing took ages to curl. In an inspired moment, i took out my heat gun (from Krafer's Paradise at Century Square Mall) and heated up my tool. Not too hot of course, in case I totally destroyed the hairs or the pad beneath. :E

 worked.like.a.charm. :D :D :D Trimmed the tape portion down to a manageable size, and proceeded with the next step.

For those who are wondering, this is what I used in place of PVA glue. I believe it's also PVA-based, but dries a lot harder than the usual stuff I get at Popular bookstore.

 Lined the black eyeliner portion with PVA glue. I put the lashes from the outer edge in, and neatened it along to the centre. Which isn't the brightest way to do it, should have done it from the inner edge out. But I knew I would be adjusting the lashes alot anyway, so didn't matter. The left eyelashes are also a tad longer than the right, but I will probably re-make the eyelashes when her -real- eyes come in.

 The company provided random coloured eyes, and all I got were blue :( I wanted Green or Violet!! No matter, I've ordered some glass eyes (Thanks Melissa for the tip!) and they should be here in a few weeks. ^ ^


Please ignore the PVA glue drying on my 'palette' XD and the stray bristles :S


Let's see how she looks now! :D The beret was something I knitted a long time ago for Baobei, my bunny :E

I wonder how many of you actually read everything :P I tend to be too longwinded, and can't be bothered to edit, I need to go for my mini-meet now!!!

And just a preview of what you might be expecting, BJD-information wise.....

Here's a stash of fabrics I got for Clover's wardrobe :) I might not be as mean on the machine as Chun is, but I've done a fair share of sewing and knitting before mini-making, so let's see if those skillsets still exist XD

~~~~~~~~~~~~~~~~~~~~~~~~~~~~~~~~~~~~~~~~~~~~

PHEW! DONE! So remember to tell me if you prefer to see all my BJD-related stuff on a separate blog, or keep it all here!


UPDATE! Better photo of the details, like freckles etc :) Still waiting for her eyes to come before I redo her lashes ^ ^